DIY Display Pedestal for Under $100
You’ve probably seen these art display pedestals gracing minimalist-chic interior posts on Instagram. As someone who has fully embraced the neutral, minimalist aesthetic in every way, these clean, modern columns instantly grabbed my attention. I’ve seen them used to display everything from plants and floral arrangements to intricate sculptures. I loved the idea of moving them around or changing out their displays depending on my mood of the moment. So, you can imagine my disappointment when I went searching for one of my own and found all the available options to be too expensive, too flimsy looking, or the wrong size for my space. Not to be deterred, I decided to simply make one myself.
The closest thing I could find that mimicked the look I wanted was this table from CB2. However, I didn’t like the shiny finish or the price point given that I eventually want more than one. Still, I used it as a model for size and found this YouTube tutorial to help me achieve the look. My exact technique and materials are below!
MATERIALS USED
5 Rubbermaid Laminate shelf boards (11.8″ depth x 35.8″ length)
12 angle brackets and screws
Caulk
Paint primer
Sandpaper
ASSEMBLY INSTRUCTIONS
I originally went to Lowe’s with the intention to buy MDF planks and have them cut to my exact size specifications. However, I happened upon these Rubbermaid shelves in the store, and they were close enough to the height and width I wanted, so I opted to use those rather than the MDF. The shelves come in other sizes if you want your finished pedestal to be shorter or wider, or you can always just use MDF, or wood planks, and have them cut to the size you want. I bought 4 of these as is to use as the walls of the pedestal, and I bought a fifth and had it cut in-store to be the size I needed for the top. Mine ended up being XX.
As I mentioned earlier, I found a fantastic YouTube tutorial (linked again here), which helped me see how to put all the pieces together to achieve the look I wanted. For the assembly, I followed the method used in the video pretty closely, with a few key exceptions which I’ll detail.
I set up a folding table and started to glue the shelf boards together as they do in the video (starting at the 50 second mark). I used the wood glue to secure two pieces together as shown, but instead of using a nail gun to reinforce the adhesive, I used the angle brackets I linked above. I put one towards the bottom of the boards and one towards the top to ensure it was balanced (photos below). If you have a nail gun, feel free to use that! I don’t, so it was easier for me to simply drill in the brackets.


I then continued to put all four sides together using the same method shown in the video, just using the brackets instead of nails.
At the 2 minute mark in the video, they show how they used 2x2s to assemble the top. I used their same method, except replaced the 2x2s with 4 angle brackets, one on each side of the column. I then placed the precut top piece on those and secured it with screws instead of glue and nails.
After all the pieces were assembled, I caulked any gaps or uneven spots where the pieces were joined together. I wasn’t particularly concerned with making these super perfect since I planned to use a textured finish that would hide most imperfections, but I still made the joints as smooth as I could.
I then put a primer coat on using a paint roller, allowed it to dry for a few hours, then followed up with a coat of the textured material. I decided to use the texture paint because I wanted the finished product to have a Mediterranean plaster feel. However, you could also simply paint the pedestal from here in whatever color or finish you would like. You can also paint over the textured coat, but I opted not to.

Texture Closeup Before Sanding

Texture Closeup After Sanding
After the initial coat of texture dried, I sanded it lightly (not enough to remove the plaster look but enough that it wasn’t completely uneven and messy looking). I then added another coat of texture and sanded it once again when it dried.
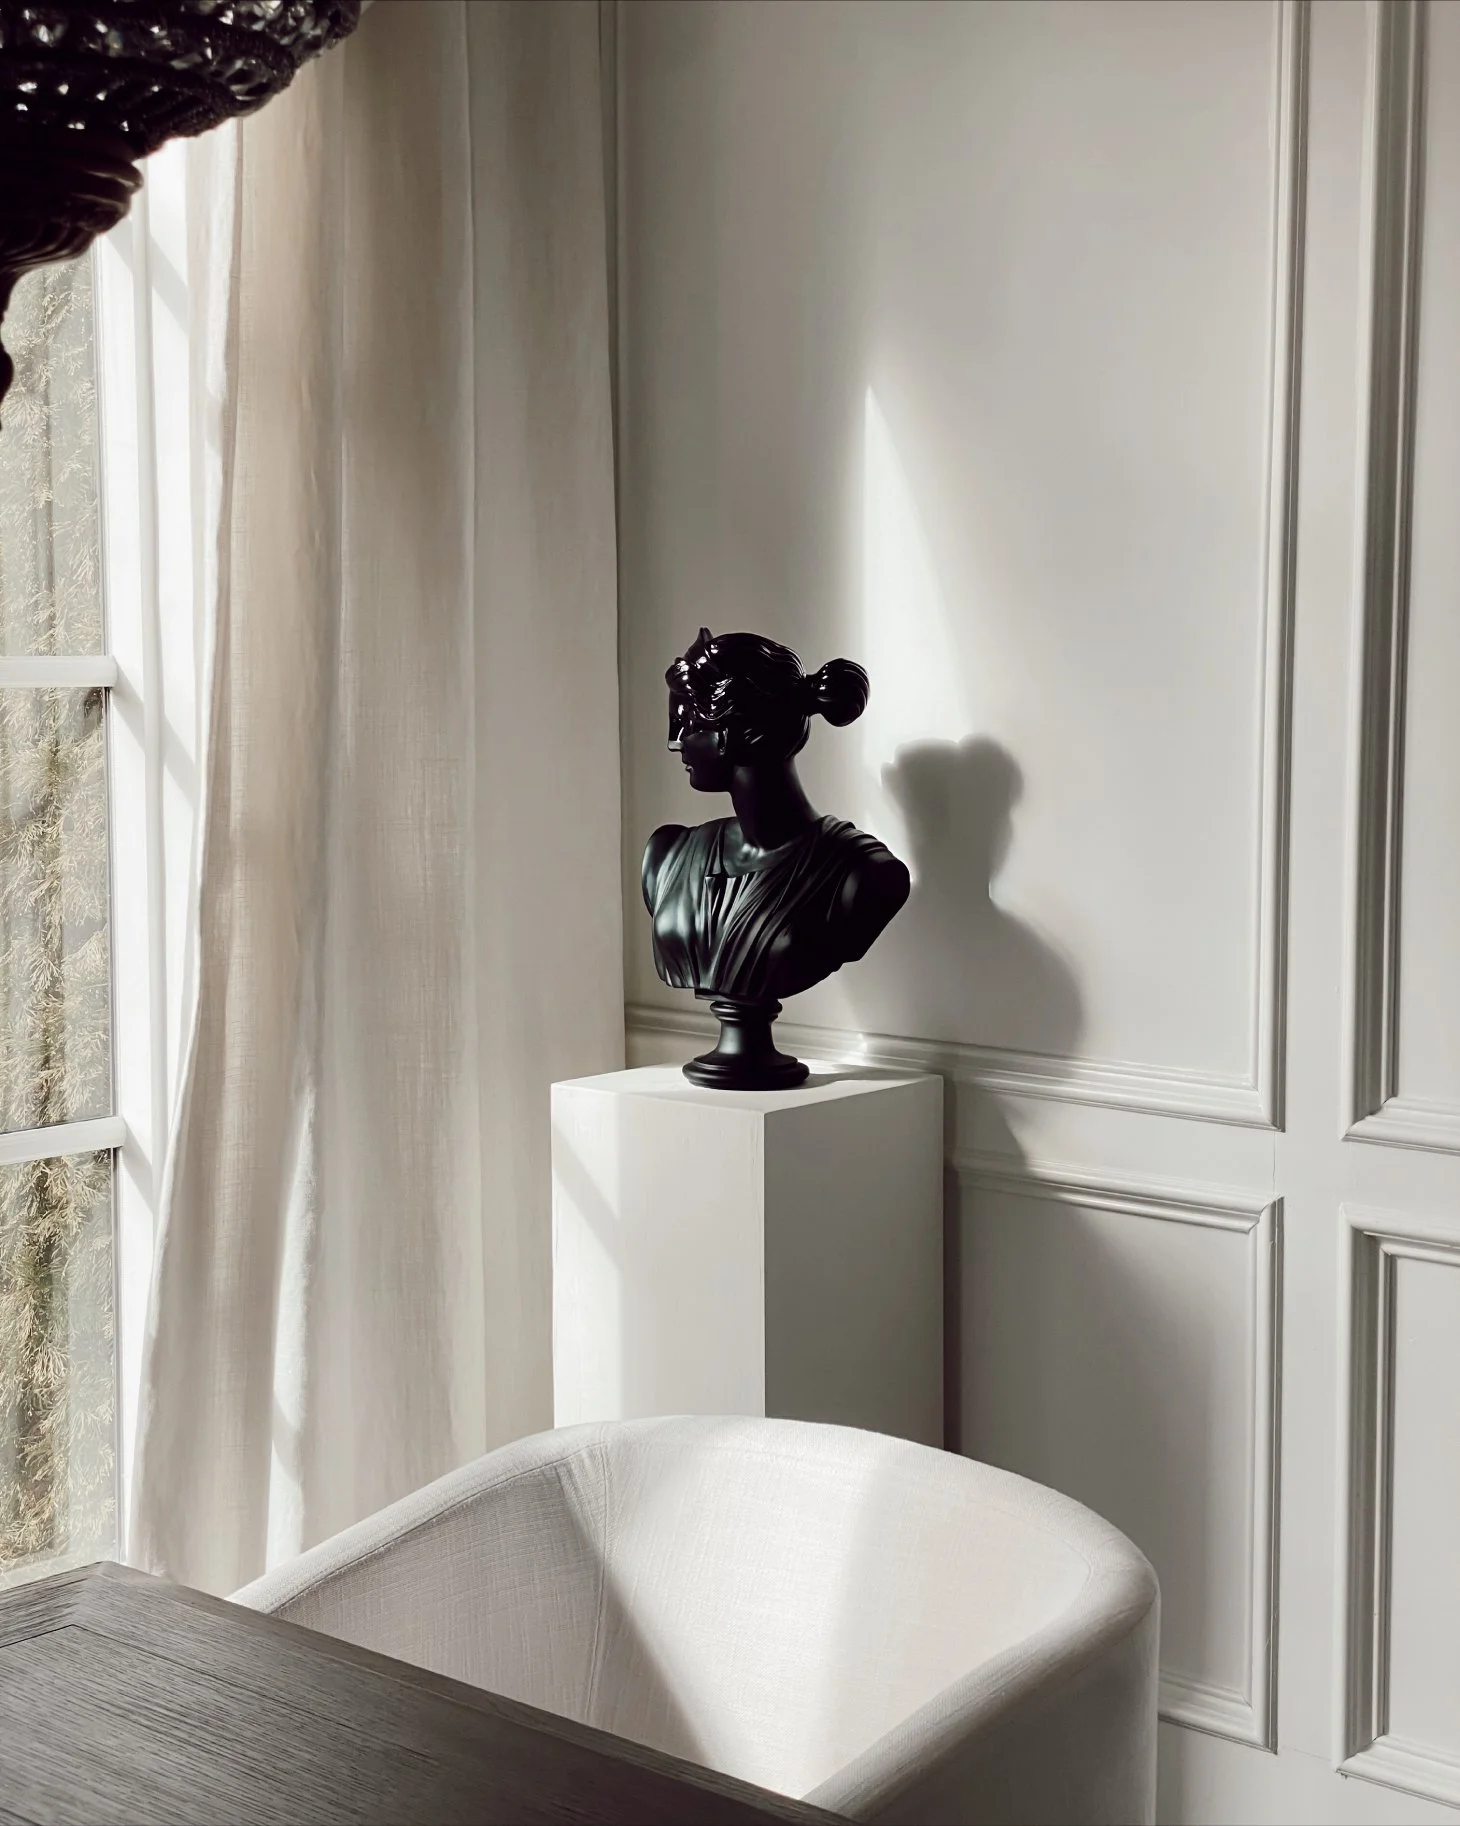
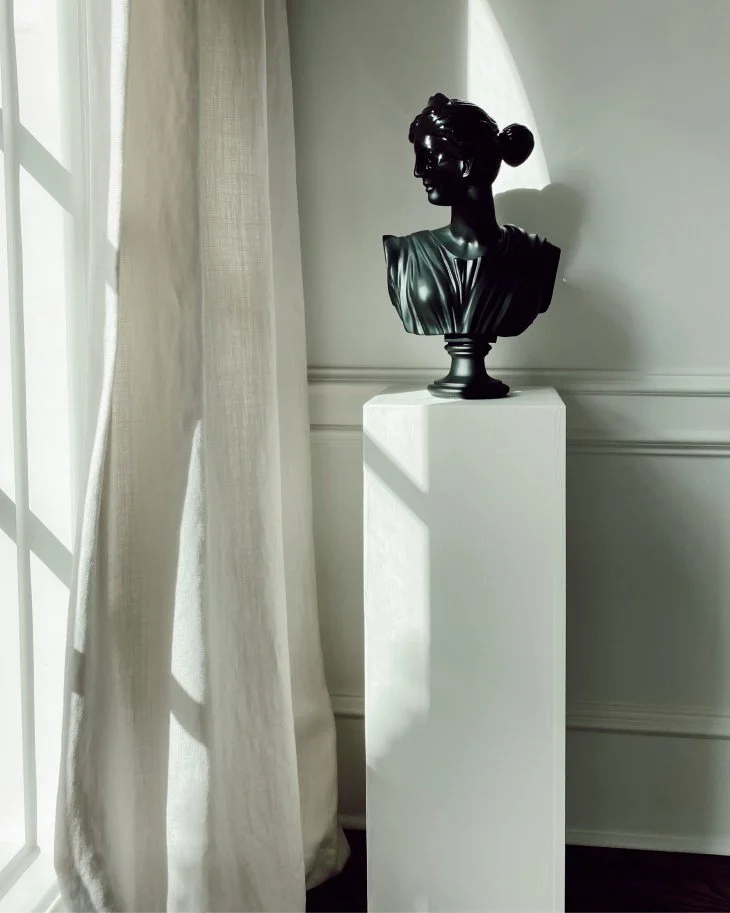
This is the finished product! I’m so happy with how it turned out, and I will definitely be making more for other locations in my house. The best part is all of the materials were less than $100, and since I have leftover primer and texture, the next ones will be even less.
Let me know if you give this DIY a try! As always, thank you for reading and sharing. XOXO
If you liked this post, save it to Pinterest!